Actions & Action Groups
Actions
Actions are the individual commands that Indigo will perform: turn on a light, send an email, etc. You can specify as many actions as you like for each Trigger, Schedule, Action Group, and Control Page element.
On any dialog that has an area where you select actions (Triggers, Schedules, Action Groups, and Control Pages), The first thing you'll see is the Type popup:
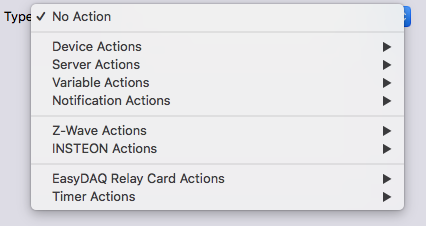
Actions are grouped into 6 main categories (some of those categories have subcategories) and then below those there is a category for each plugin that provides actions that aren't integrated into other menus.
Device Actions
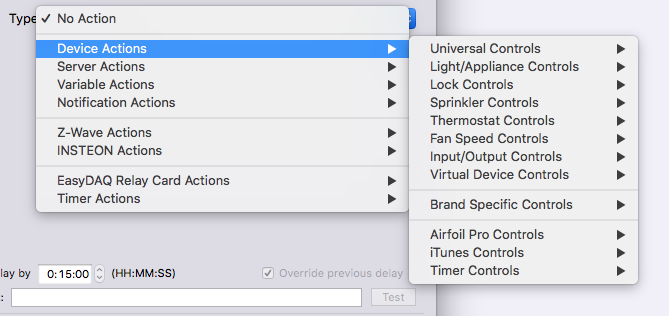
The Device Actions category has 7 subcategories. Plugins can also add a submenu to this category for the actions they define that work directly on devices. By default, Indigo ships with the Airfoil Pro and Timers and Pesters plugins, which add subcategories to this menu. You may have other menus as well if you've installed 3rd party plugins.
Universal Controls
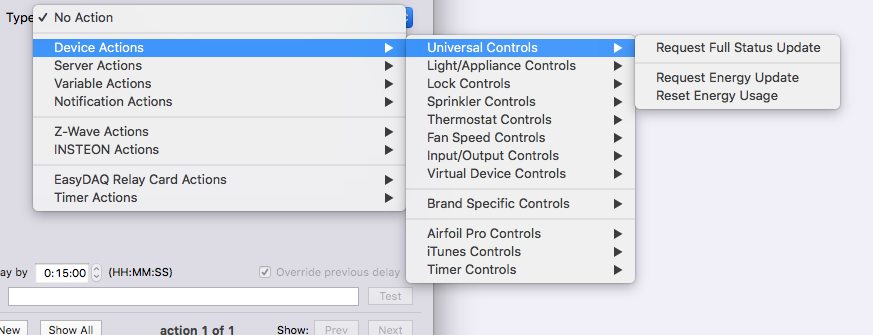
These controls are either universal across most devices or are available on some specific types of devices (KeypadLincs for instance).
Request Full Status Update- ask the device to reply with all possible status information. This is dependent on the capabilities of the device.Request Energy Update- ask the device to reply with only its energy usage information. This is dependent on the capabilities of the device - many do not support energy monitoring.Reset Energy Usage- ask the device to reset the running total of energy usage. This is dependent on the capabilities of the device - many do not support energy monitoring.
Light/Appliance Controls
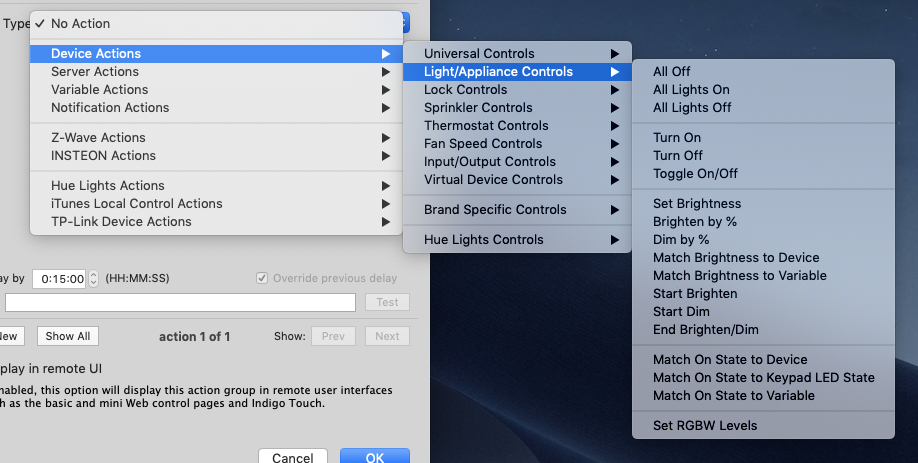
These controls are for lights and on/off (sometimes called relay) devices.
All Off- turn off all light and appliance devices. TheDevices:popup lets you selectAll Insteon/X10,All Insteon,All X10, or a specific X10 house code.All Lights On- turn on all light devices with the sameDevices:options asAll OffAll Lights Off- turn off all light devices with the sameDevices:options asAll OffTurn On- turn on a specific device with an optional complementaryAuto-off after X minutesactionTurn Off- turn of a specific device with an optional complementaryAuto-on after X minutesactionToggle On/Off- turn on the device if it's off or off if it's onSet Brightness- set the brightness of a lamp device to a specific percentage (from 0-100)Brighten by %- increase the brightness of a lamp device by a specific percentage (from 0-100)Dim by %- increase the brightness of a lamp device by a specific percentage (from 0-100)Match Brightness to Device- set the brightness of any number of dimmer devices to the value of the selected dimmer device - so you can quickly and easily create a very simple scene.Match Brightness to Variable- set the brightness of any number of dimmer devices to the value of the selected variable.Start Brighten- for Insteon and Z-Wave dimmers, start to brighten the load (using the device's specific ramp rate). You can pair this with anEnd Brighten/Dimcommand or you can just allow it to brighten all the way to 100%.Start Dim- for Insteon and Z-Wave dimmers, start to dim the load (using the device's specific ramp rate). You can pair this with anEnd Brighten/Dimcommand or you can just allow it to dim until it's finished. Insteon devices will end up at 0% (off), but some Z-Wave devices may stop at 1% rather than being completely off.End Brighten/Dim- for Insteon and Z-Wave dimmers, end a previously issuedStart BrightenorStart Dimand update the brightness of the device in Indigo at whatever level the dimmer was at when it stopped.Match On State to Device- set the on state of any number of on/off or dimmer devices to the value of the selected device which supports an on state.Match On State to Keypad LED State- set the on state of any number of on/off or dimmer devices to the value of the selected Insteon KeypadLinc button.Match On State to Variable- set the on state of any number of on/off or dimmer devices to the value of the selected variable.Set RGBW Levels- set the RGBW levels for lights that support setting their color.
Sprinkler Controls
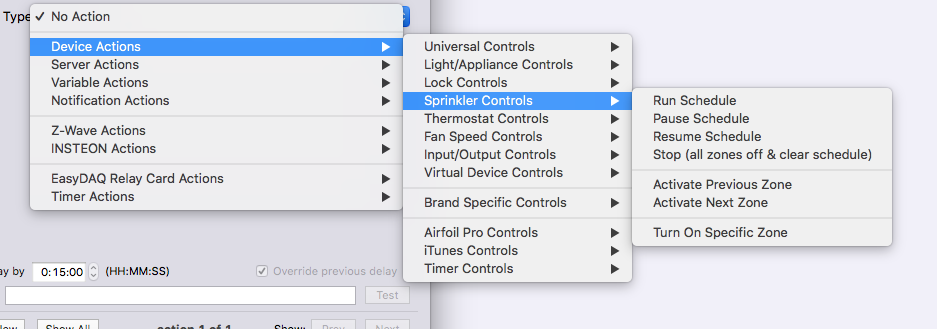
These are the options for controlling your sprinkler:
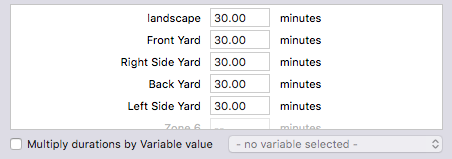
Run Schedule- selecting this action will show you the zone list (shown above - note the list will scroll to show all available zones for the sprinkler) that will allow you to set the duration for each zone and optionally multiply those durations by the selected variable. This last option is useful if you change durations based on time of year - you can change the variable value but keep the existing schedule and it'll adjust the duration as appropriate.Pause Schedule- this action will pause the current schedule (if for instance you're walking to your car and don't want to get wet)Resume Schedule- this action will resume a previously paused schedule (once you're in your car)Stop (all zones off & clear schedule)- this action will completely stop the scheduleActivate Previous Zone- this action will cause the schedule to back up one zoneActivate Next Zone- this action will cause the schedule to jump to the next zoneTurn on Specific Zone- this action will turn on a specific zone for the maximum run time specified in the sprinkler's definition and will turn off after it's done
Thermostat Controls
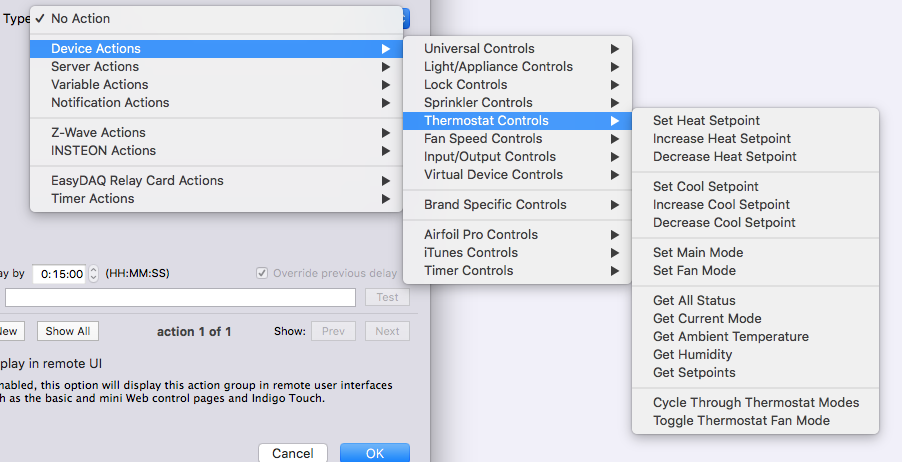
There are 13 basic actions available:
Set Heat Setpoint- set the heat setpoint to an absolute temperatureIncrease Heat Setpoint- increase the heat setpoint by some number of degreesDecrease Heat Setpoint- decrease the heat setpoint by some number of degreesSet Cool Setpoint- set the cool setpoint to an absolute temperatureIncrease Cool Setpoint- increase the cool setpoint by some number of degreesDecrease Cool Setpoint- decrease the cool setpoint by some number of degreesSet Main Mode- set the mode of the thermostat to one of the following:All Off- set the HVAC unit so that both heat and cool setpoints are ignored - the unit will not come on at allHeat On- activate the HVAC unit so that only the heat setpoint is usedCool On- activate the HVAC unit so that only the cool setpoint is usedHeat/Cool On- activate the HVAC unit so that both heat and cool setpoints are usedRun Heat Program- tell the thermostat to run the heat program that is programmed directly into the thermostat (see the thermostat documentation for details)Run Cool Program- tell the thermostat to run the cool program that is programmed directly into the thermostat (see the thermostat documentation for details)Run Heat/Cool Program- tell the thermostat to run the heat/cool program that is programmed directly into the thermostat (see the thermostat documentation for details)
Set Fan Mode- set the fan mode of the thermostat to one of the following:Fan Auto On- set the fan so that it only runs as neededFan Always On- turn the fan on so it'll continuously run
Get All Status- get all information from the thermostatGet Current Mode- get the current modeGet Ambient Temperature- update the temperatureGet Humidity- get the humidityGet Setpoints- get the setpointsCycle Through Thermostat Modes- this will allow you to easily cycle through thermostat modes in this order: Off, Cool, Heat, Auto. Especially useful in conjunction with the "Thermostat Mode+.png" image on a control page - just add this as a server action and you have a simple control for adjusting the thermostat mode - each time you tap/click the image, the thermostat selected will cycle to the next mode just like pressing the Mode button on the thermostat itself (if it has one).Toggle Thermostat Fan Mode- like the action above, this method will toggle between the two fan modes: Fan On (always on) and Fan Auto (automatic). Again, useful with the "Thermostat Fan Mode+.png" image file.
v1 Insteon thermostat adaptors didn't broadcast out changes to update its internal state representations for the thermostats - which is why there are so many options to get status. Indigo catches the v2 thermostat update broadcasts so the need to manually get updates should be reduced.
Fan Speed Controls
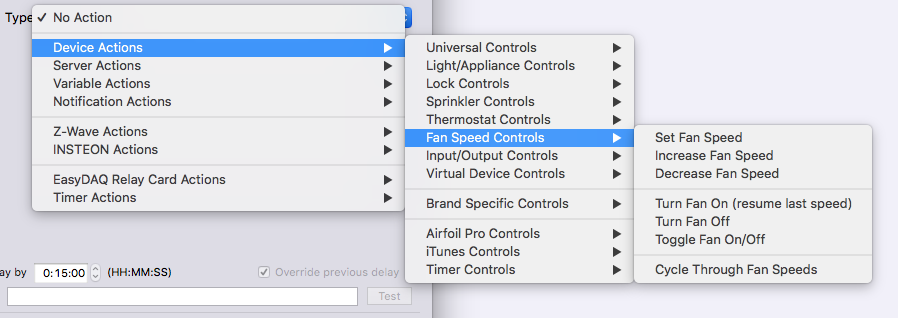
Here are the 7 actions for fan speed control:
Set Fan Speed- set the speed of the device to a specific levelIncrease Fan Speed- increase the fan speed by some # of units - for instance, on a FanLinc that's currently onLow, increasing the fan speed by 1 will set it toMediumDecrease Fan Speed- decrease the fan speed similarly to the above Increase Fan SpeedTurn Fan On (resume last speed)- this will turn the fan on to its last speed settingTurn Fan Off- turn the fan off completelyToggle Fan On/Off- toggle between on and offCycle Through Fan Speeds- use this action to cycle through the fan speeds in highest to lowest speed order. It's basically an electronic version of pulling a fan's chain.
Input / Output Device Controls
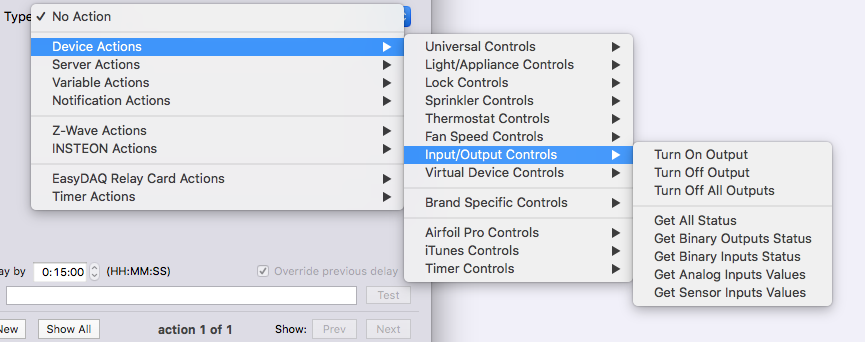
There are eight actions available:
Turn On Output- turn on the specified outputTurn Off Output- turn off the specified outputTurn Off All Outputs- turn off all outputsGet All Status- get the status of all inputs and outputsGet Binary Outputs Status- get the status of all the binary outputsGet Binary Inputs Status- get the status of all the binary inputsGet Analog Inputs Values- get the voltage value of all the analog inputsGet Sensor Inputs Values- get the value of the 1-wire sensor bus (only available on some I/O devices)
Virtual Device Controls
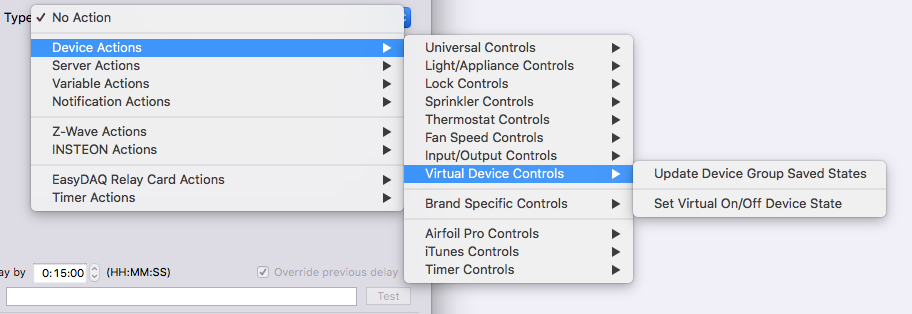
There are a few controls specific to Virtual Devices:
Update Device Group Saved State- updates the saved state of all devices in a device group so the next ON command will match their current settings.Set Virtual On/Off Device State- explicitly sets the state of a virtual on/off device. Useful if the state gets out of sync or is not maintained by a variable.
Brand Specific Controls
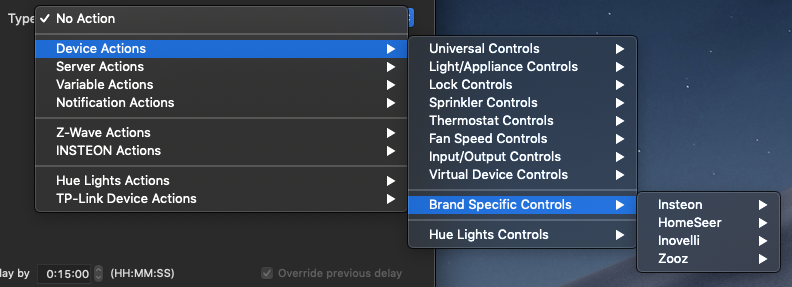
The Brand Specific Controls submenu contains submenus that hold device specific commands that are unique to a particular brand of device (manufacturer). There are two described below:
Insteon
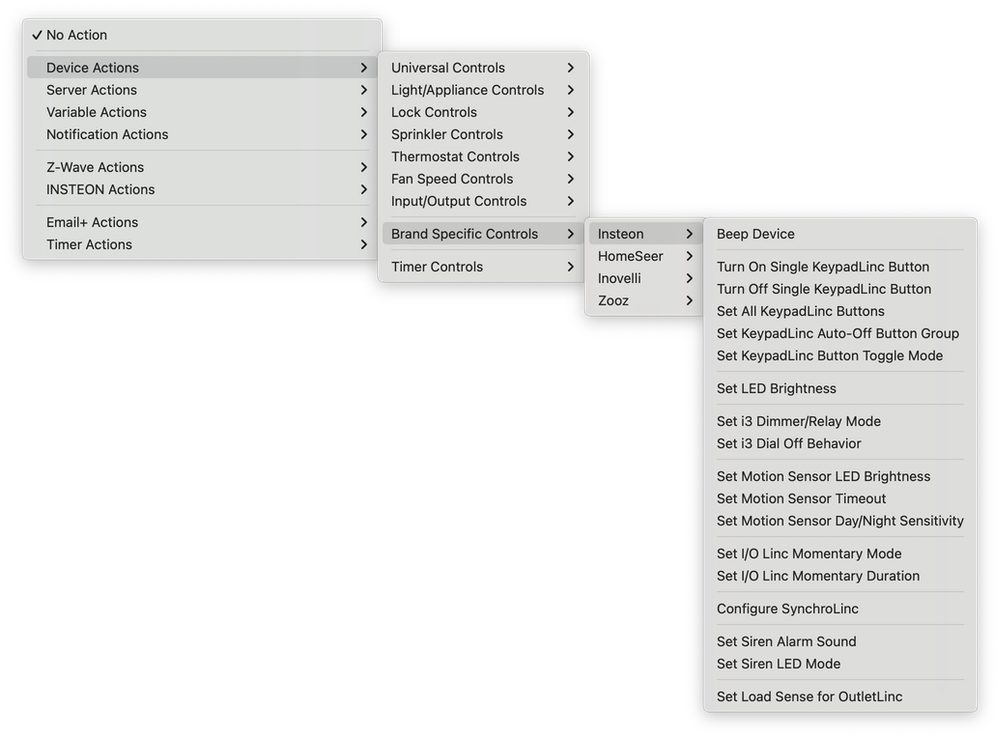
Beep Device- ask the device to beep. This function is dependent on the capabilities of the device.Turn On Single KeypadLinc Button- turn on one individual KeypadLinc button.Turn On Single KeypadLinc Button- turn off one individual KeypadLinc button.Set All KeypadLinc Buttons- turn on/off groups of buttons. Why not just have multiple actions using the built-in Turn ON/Turn OFF LED actions? Because each of those requires a lot of Insteon traffic - and if you need to set several buttons at once this action will do it in one (or two if you want to maintain some buttons) action(s). It's more efficient and easier to configure (one action versus potentially seven actions). Select the action you want to take for each button:Turn On,Turn Off,Leave Alone. The latter option will require that we query the KPL to find the states first so if you select that for any of the buttons the action may execute a bit slower than it would otherwise. Note: using this action, which is sending raw Insteon commands through the IndigoServer, will cause the KeypadLinc's button states in Indigo to become out of sync. This is because the server doesn't know that you're changing the button states given that it's just a raw command message that it's being asked to send to the PowerLinc. If you need to keep the states in sync then add another action to do a status request to the KeypadLinc (after a short delay to avoid collisions).Set KeypadLinc Auto-Off Button Group- specify what buttons will go off automatically when you press any other button. Useful in conjunction with Toggle Mode below for creating "radio groups". See the Fanlinc And Keypadlinc article for usage examples.Set KeypadLinc Button Toggle Mode- specify whether a button toggles (alternates between ON and OFF when pressed) or whether it sends a single command anytime it's pressed (can send either ON or OFF). Useful in conjunction with Auto-Off groups above for creating "radio groups". See the Fanlinc And Keypadlinc article for usage examples.Set LED Brightness- set the brightness of the LEDs on certain devices. Newer KeypadLincs are supported as well as some SwitchLinc models. Unfortunately there isn't really a way to tell you which devices are supported so you'll just have to try it and see if it works.Set i3 Dimmer/Relay Mode- set the behavior for i3 modules that support both on/off and dimmable loads.Set i3 Dial Off Behavior- set the behavior when an i3 Dial is fully rotated counterclockwise: off or dim to 1%.Set Motion Sensor LED Brightness- set the brightness of the LED that flashes inside the motion sensor when motion is detected. While the brightness value is between 0 and 255, 0 does not mean the LED is completely off - it's just very dim. Note: only revision 2 Motion Sensors with jumper 5 set can be configured.Set Motion Sensor Timeout- set the timeout value between the time the motion sensor stops detecting motion and when it sends the OFF command. The timeout values work like this: 0 is equal to 30 seconds and 255 is equal to 2 hours. Values in between are proportional to those values. Note: only revision 2 Motion Sensors with jumper 5 set can be configured.Set Motion Sensor Day/Night Sensitivity- set the sensitivity for when the motion sensor detects changes from dawn to dusk and vice versa. The sensitivity values work like this: 0 will make the sensor register day all the time and 255 is equal to night all the time. Values in between are proportional to those values. Note: only revision 2 Motion Sensors with jumper 5 set can be configured and Motion Sensor II models will interpret 0 as 3.Set I/O Linc Momentary Mode- set the momentary mode of an I/O Linc to A, B, C, or None (the built-in UI only sets A or None).Set I/O Linc Momentary Duration- set the duration the output will be on before it automatically goes off (if momentary mode is turned on with the above command).Configure SynchroLinc- configure the Trigger Watts, Threshold Watts, and Delay Seconds in a SynchroLinc. Here are the details of those settings: - Trigger Watts (0 to 1800 watts in 0.5 watt steps): the wattage needed before the SynchroLinc broadcasts. - Threshold Watts (aka hysteresis, 0 to 127.5 watts in 0.5 watt steps): tolerance before on/off toggle is sent. - Delay Seconds (0.15 to 38.25 seconds): prevents message flooding if thresholdWatts is too low.Set Siren Alarm Sound- configure the sound that will be played the next time the alarm is activated. Choose between chime (doorbell) or siren (loud). The sound will change if this action is called while the siren is sounding.Set Siren LED Mode- configure what the LED on the siren does. Choices are: On Solid, Blink on Insteon Traffic, OffSet Load Sense for OutletLinc- configure the load sense on either outlet in the OutletLinc (dual outlet only)
HomeSeer
The HomeSeer 200+ series of devices (WD200+, WS200+, FC200+, and HSM200 as of this release) allow the various LEDs on those devices to be controlled in a variety of ways. These actions enable controlling those features.
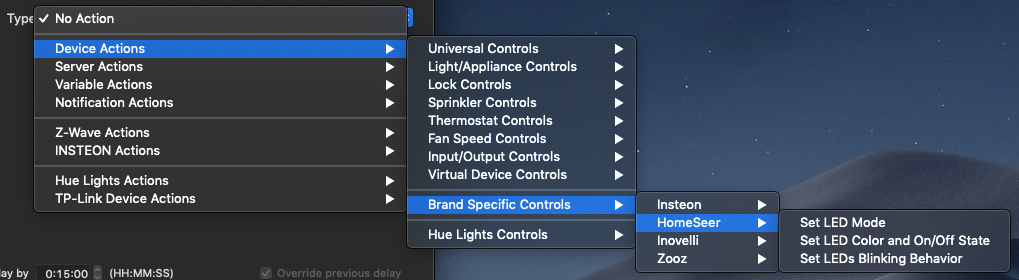
Set LED Mode- set the mode of the LEDs on the switch. The defaultNormal (load status)behavior is for them to represent the brightness to which the switch is set. You can set the switch toStatus (custom status)which will allow you to individually turn on and off each LED and set its color. You can also set the bottom LED's behavior.Set LED Color and On/Off State- when the switch is inStatusmode, you can use this action to turn on/off and set the color of any of the LEDs.Set LEDs Blinking Behavior- start/stop LEDs from blinking.
Inovelli
Several recent Inovelli devices (LZW30, LZW30-SN, LZW31, LZW31-SN and LZW36 as of this release) allow the various LEDs on those devices to be controlled in a variety of ways. These actions enable controlling those features.
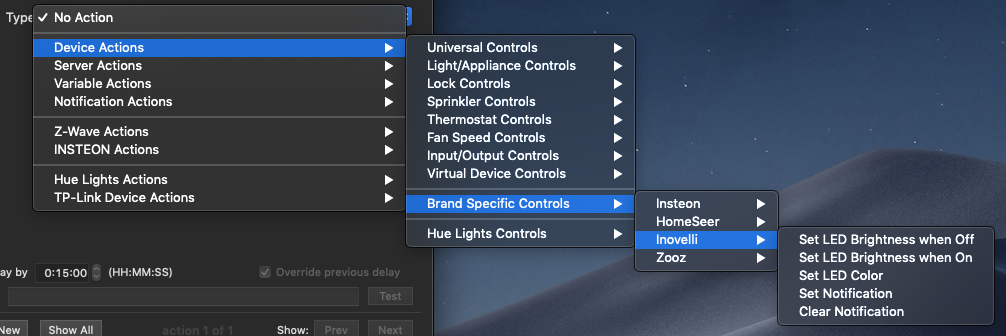
Set LED Brightness when Off- this will set how bright the LED is when the device is off (nice for night time to easily locate switch in the dark).Set LED Brightness when On- this will set how bright the LED is when the device is on.Set LED Color- sets the color of the LED.Set Notification- some Inovelli devices allow you to set what they refer to as a notification. This is a combination of color, brightness, effect (pulse, flash, etc), and duration. The net effect is that you can change the behavior of a device's LED temporarily (with or without an automatic timeout) to act as a visual notification. When the notification times out (or is explicitly cleared) it will revert to its previous setting.Clear Notification- clears a previously set notification (does nothing if no notification is active on a device).
Zooz
The Zooz ZEN30 allows the various LEDs on it to be controlled in a variety of ways. These actions enable controlling those features.
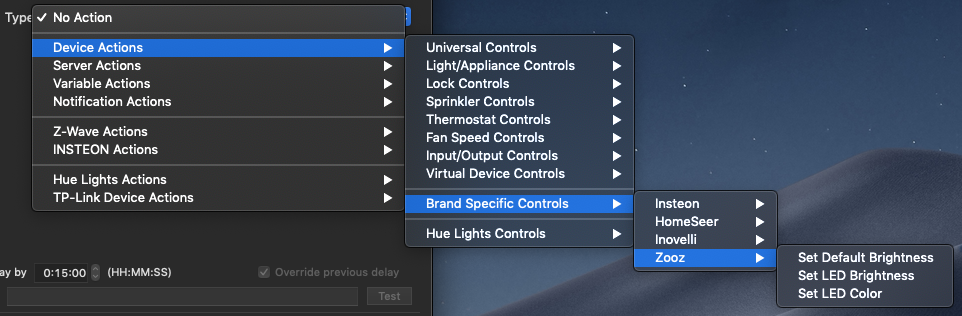
Set Default Brightness- set the brightness that the dimmer device will come on to. Note this only applies to manual operation - Z-Wave ON commands will always result in the switch returning to its previous brightness.Set LED Brightness- set how bright the LEDs are.Set LED Color- set the color of the LEDs.
Server Actions
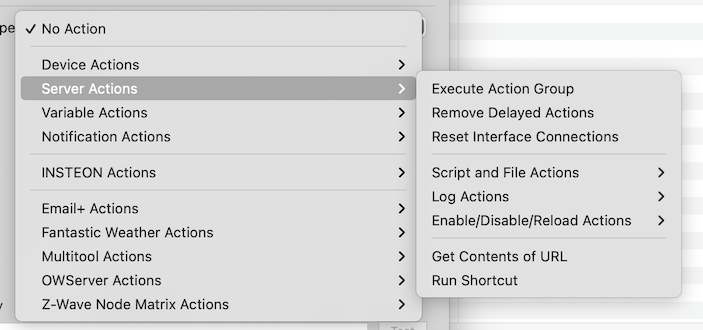
The Server Actions category has three actions and three subcategories, described below:
Execute Action Group
Executes a specified Action Group.
Remove Delayed Actions
Removes delayed actions, with the following options:
Remove all delayed actions- removes all delayed actions regardless of delay typeRemove for device- removes any delays for the selected deviceRemove for trigger- removes any delays from the selected triggerRemove for schedule- removes any delays from the selected schedule
Reset Interface Connections
Resets the Insteon and X10 RF interfaces.
Script and File Actions
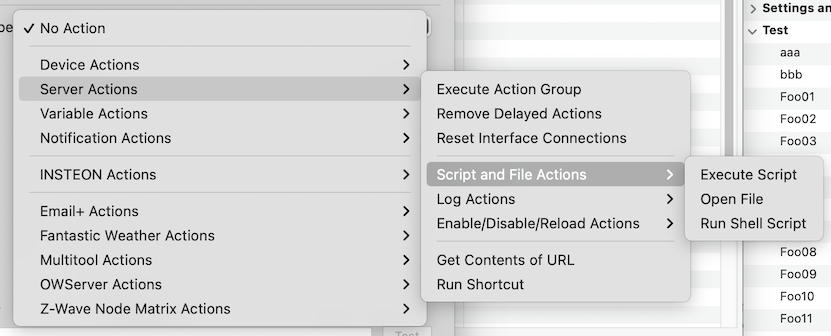
Execute Script
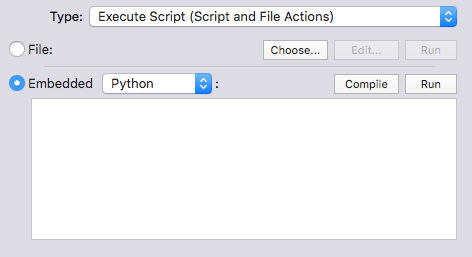
The Execute Script action allows you to execute a Python script as an embedded script or stored in a script file. In general, you should use embedded scripts for scripts that are short and very quick to execute.
Embedded scripts will be limited to 10 seconds of execution time - if they run longer than that they will be killed. If you have a script that is a long running script you should save it in a separate file and execute it from the file by selecting the File radio button then selecting the file. Scripts executed from files are executed in their own process and are therefore much less likely to adversely effect the server process if they don't work as expected.
For embedded scripts, you can click the Compile button and we'll do our best to check the script for syntax errors. Click the Run button to have the script executed immediately.
Open File
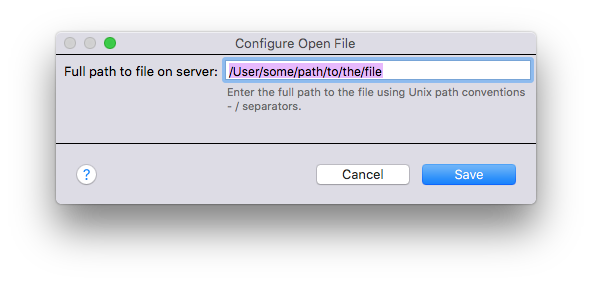
This will open the specified file (full path using *nix slashes ("/")) using the default application. If it's the path to an application (e.g. "/Applications/TextEdit.app") then it will launch that app. You can also add command-line options and include Indigo substitutions. Note: file paths that contain spaces will need to have the spaces escaped with a backslash - /some\ path/that\ has/escaped\ spaces/.
Run Shell Script
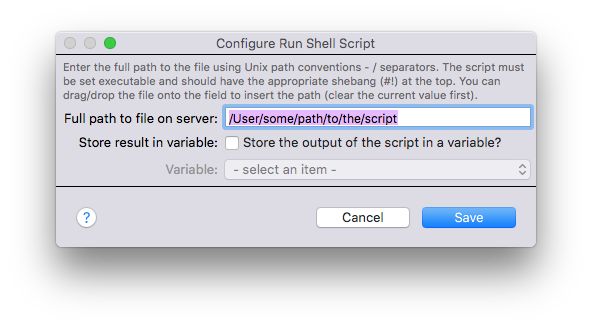
This will run the specified script file optionally with the output being inserted into the specified variable. The script must be marked executable and a valid shebang (#!/path/to/shell) must be specified at the top of the script. You can also add command-line options and include markup that will do variable (%%v:VARIDHERE%%) and device state (%%d:DEVIDHERE:STATEIDHERE%%) substitutions. Note: file paths that contain spaces will need to have the spaces escaped with a backslash - /some\ path/that\ has/escaped\ spaces/.
Note: if you're running a Python script you'll probably just want to use the Execute Script action since script files run from this plugin won't have access to the IOM (import indigo, which is Python-only).
Log Actions
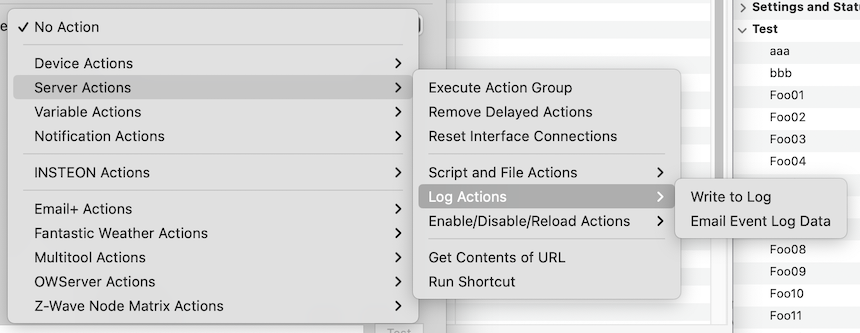
Write to Log
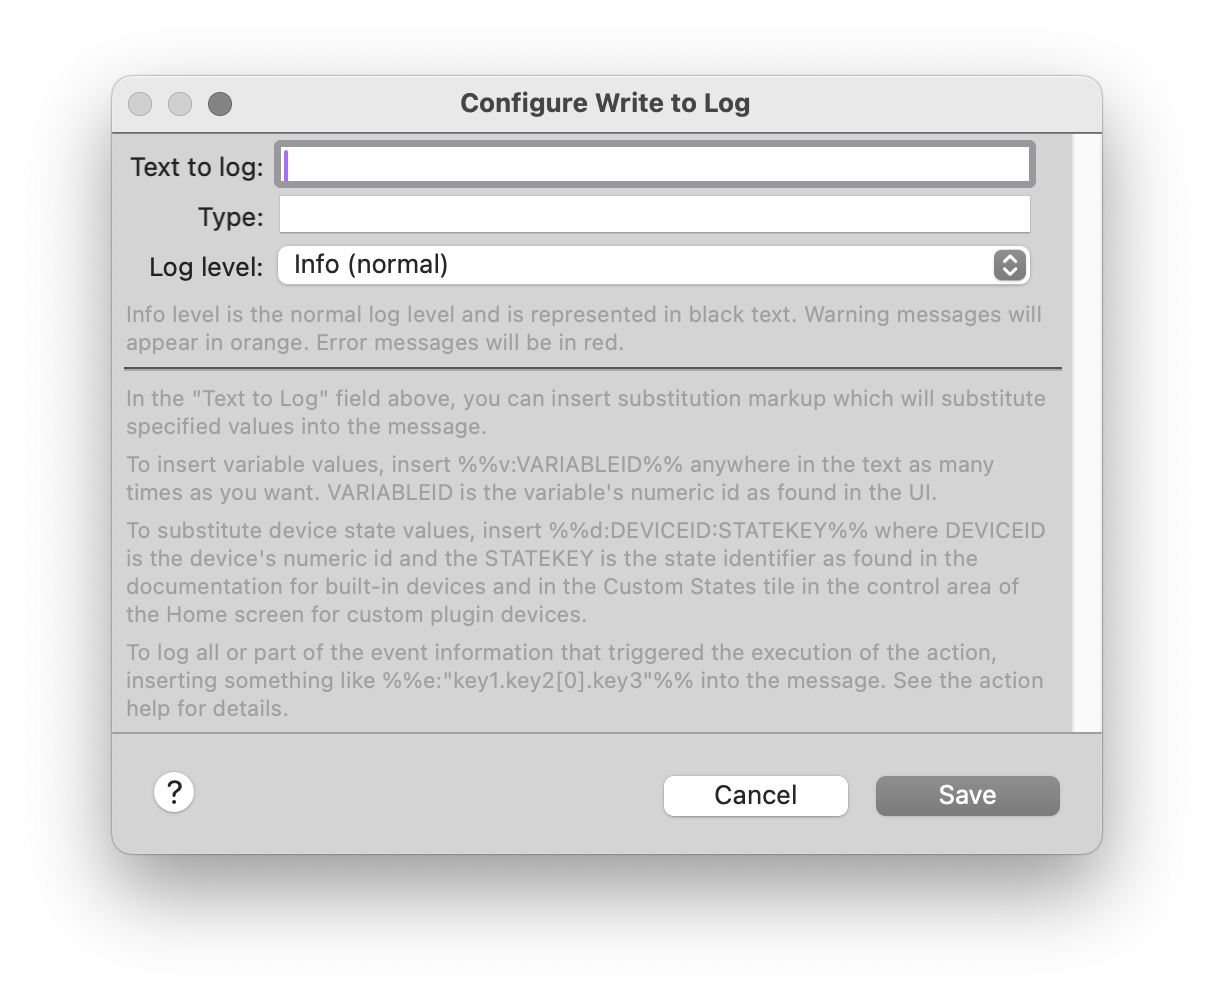
This will write the specified text into the event log - optionally with the specified type string. The Text to Log field supports the various Indigo substitutions.
In addition, you can select from three logging levels: Info (normal), Warning, or Error. The log message will be appropriately colored based on the chosen logging level.
Email Event Log Data
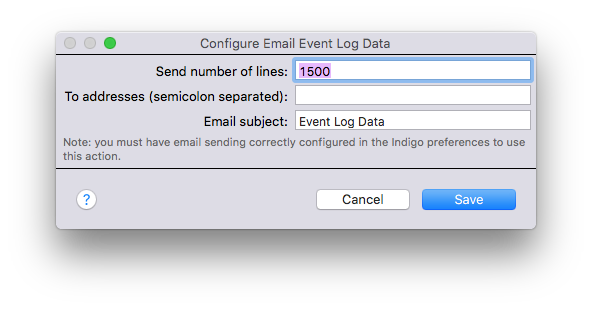
This action will send an email to the specified email addresses that contains the specified number of lines from the log file. This is useful for debugging problems (among other things). Tip: this action is also available interactively by selecting the Help->Email Log... menu item.
Enable/Disable/Reload Actions
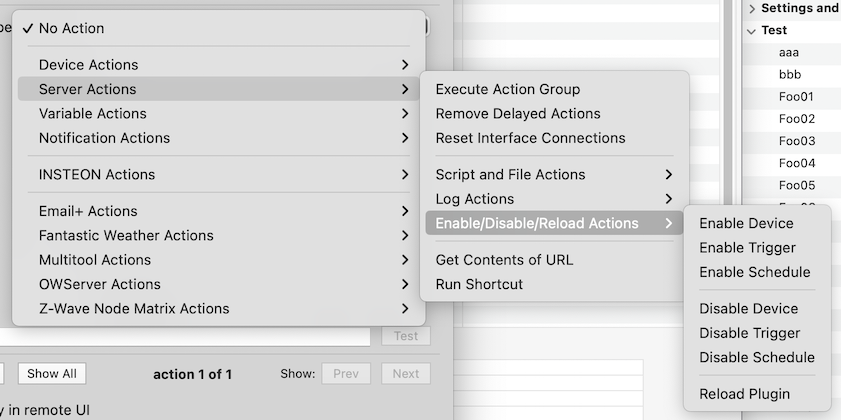
Enable Device - This action will enable Indigo communication with the selected device. You can specify an optional complementary Auto-disable after X minutes action.
Enable Trigger - This action will enable processing of the selected trigger. You can specify an optional complementary Auto-disable after X minutes action.
Enable Schedule - This action will enable processing of the selected schedule. You can specify an optional complementary Auto-disable after X minutes action.
Disable Device - This action will disable Indigo communication with the selected device. You can specify an optional complementary Auto-enable after X minutes action.
Disable Trigger - This action will disable processing of the selected trigger. You can specify an optional complementary Auto-enable after X minutes action.
Disable Schedule - This action will disable processing of the selected schedule. You can specify an optional complementary Auto-enable after X minutes action.
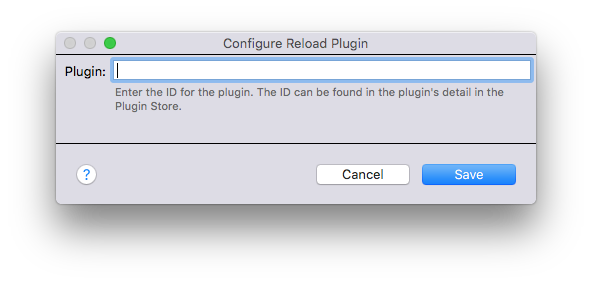
Reload Plugin - This action will restart the specified plugin. You must know the ID of the plugin: you can copy the ID in a plug's submenu on the Plugins menu or from the plugin's detail page in the Plugin Store.
Get Contents of URL
Use this action to query an API and (optionally) save the results to an Indigo variable. For more details on this action type, refer to the Get Contents of URL Action page.
Run Apple Shortcut
Use this action type to allow Indigo to fire Apple Shortcuts, provided your server is running a version of macOS that supports the Shortcuts app. The configuration dialog will present a list of all Shortcuts on the server machine as well as an input field to pass optional text to the selected shortcut when it's run.
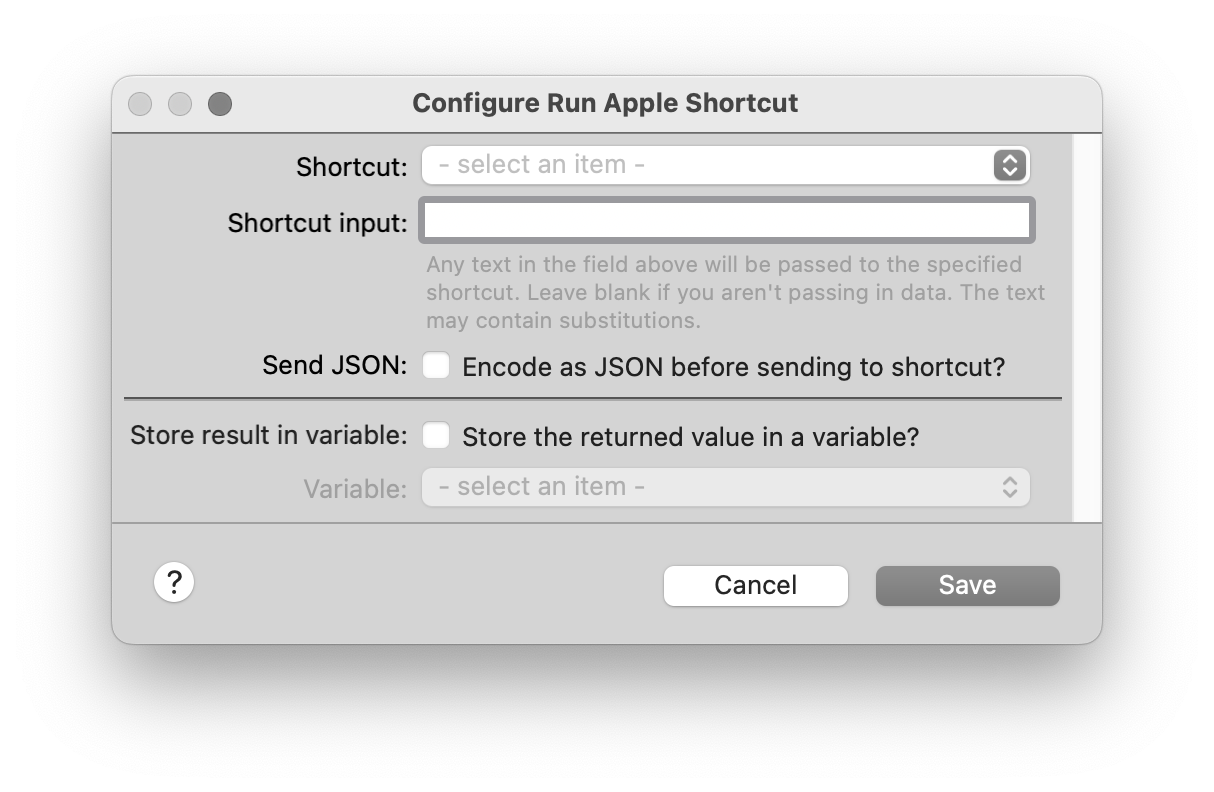
The mechanism in Shortcuts to get a dictionary from input is extremely picky about the JSON that it's fed. When checked, the checkbox in this dialog explicitly encodes the input as JSON to make things work better. It defaults to off so existing shortcuts won't be encoded. If you pass an event substitution in the input field like %%e:"some_data[0].value"%%, you will need to tick the Send JSON checkbox before the shortcut will work.
You can also optionally save any return data to a variable.
Variable Actions
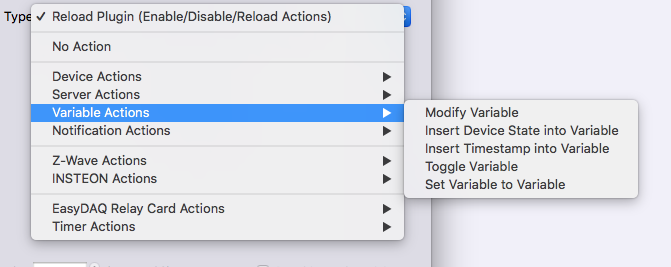
There are five actions that are specific to variables:
Modify Variable
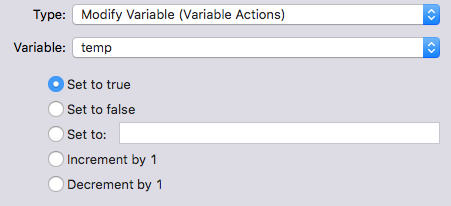
Select a variable to modify, then select the options.
Insert Device State into Variable
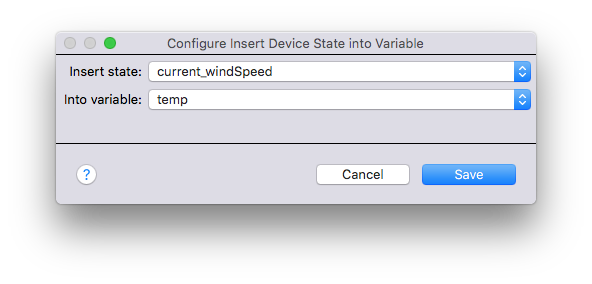
This will insert the selected state of the selected device into the specified variable. After you specify the device, click the Edit Action Settings... button and it will open a dialog (shown above) with a list of all possible states for the device you selected and a popup of all variables. You can create a trigger that executes when a device's state changes and have it insert the new state into the variable.
Insert Timestamp into Variable
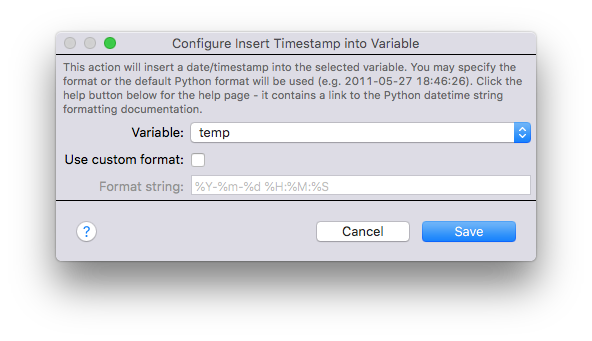
Click the Edit Action Settings... button and it will open a dialog (shown above). Here you will select the variable and, optionally, the format string as defined in the Python datetime string formatting documentation (see the chart at the bottom for format specifiers). The format in the Format string field is the default format.
Insert Event Data into Variable
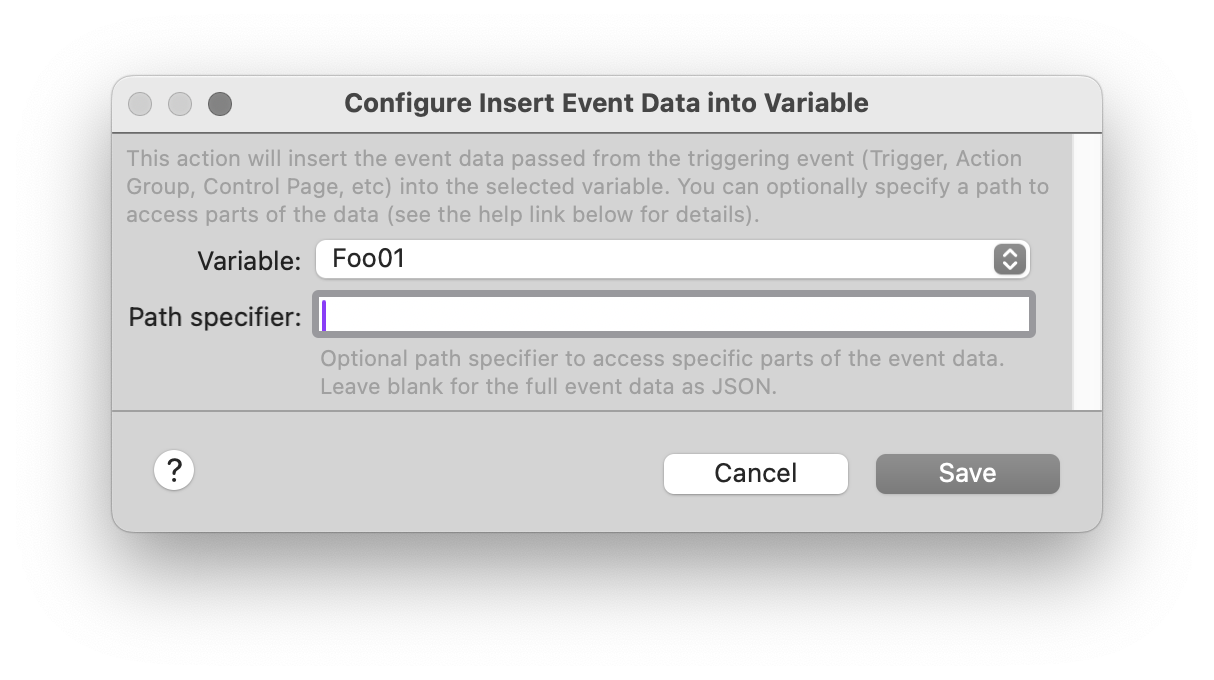
Click the Edit Action Settings... button and it will open a dialog (shown above). Here you will select the variable and, optionally, the Path string if you want to access specific parts of the event data. More information can be found on the Path Strings page.
Toggle Variable
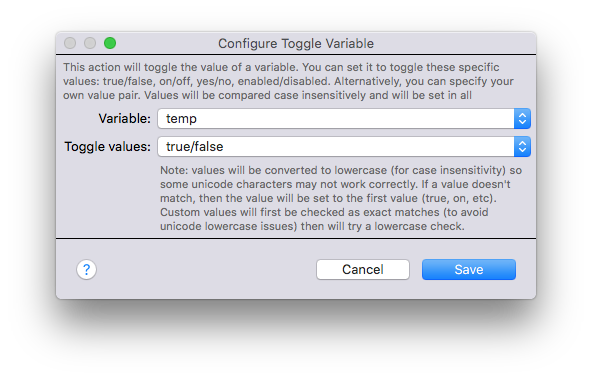
Click the Edit Action Settings... button and it will open a dialog (shown above). Here you will select the variable and the values that will be toggled. The first 4 options (true/false, on/off, yes/no, enabled/disabled) on the Toggle values menu are self explanatory (although note that values will be converted to lower-case for comparisons). The last option, Custom Values, will allow you to specify the values. We will first try to match the custom variables without converting to lowercase (some unicode characters behave oddly when lowercased) and if we don't find a match then we'll convert. Finally, if nothing matches, we'll just set the value to the first value.
Set Variable to Variable
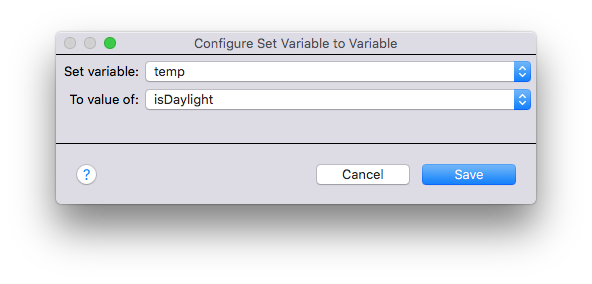
Click the Edit Action Settings... button and it will open a dialog (shown above). Here you will select the destination and source variables.
Notification Actions
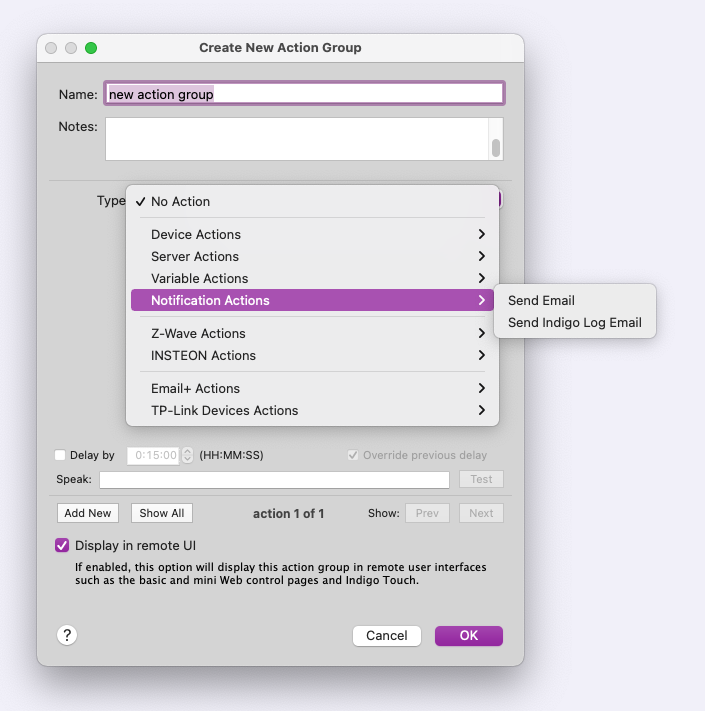
In the standard install of Indigo, there is one action: Send Email. Plugins are allowed to add menu items to this category so there may be more options if you've installed some 3rd party plugins.
Send Email
Email support is handled by the Email+ plugin - see the plugin's documentation for details on how to configure and use it.
Send Indigo Log Email
Use this action to send the Indigo log in an email.
Z-Wave Actions
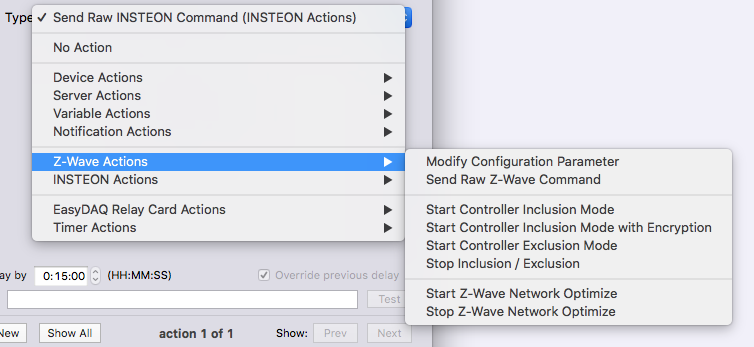
Modify Configuration Parameter
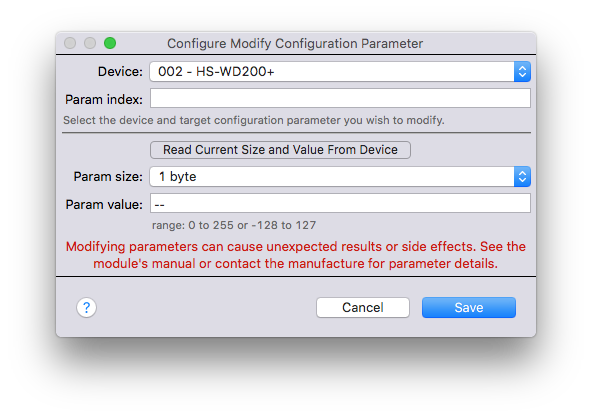
Some Z-Wave devices provide configuration options through the use of configuration parameters. These are generally outlined in the documentation that comes with a device. Indigo often times support setting these parameters directly in the device config dialog, but because of the sheer number of Z-Wave devices we can't add every one. This menu item will allow you to set any config parameter that a device accepts.
Note: this process can cause your device to not function correctly if incorrect parameters are entered so you'll want to make sure you are very careful to use only the params specified for the specific device.
Send Raw Z-Wave Command
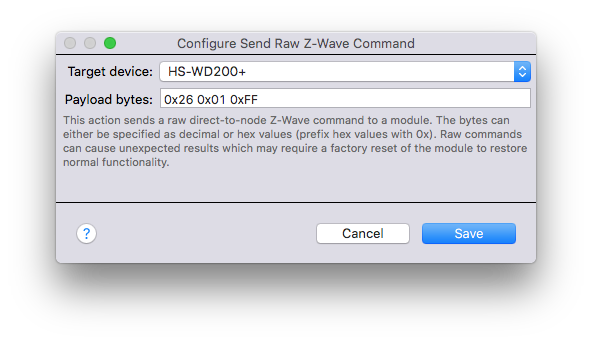
This menu selection can be used to send arbitrary Z-Wave protocol-level commands to any Z-Wave device. This is generally only useful when Support instructs you to do so. Note battery operated devices allow for the option to queue the command to be sent the next time the device wakes.
Inclusion Mode Commands
This set of actions all require no parameters - they simply control the inclusion process.
Start Controller Inclusion Mode- this will tell the Z-Wave interface to start looking for inclusion requests on the network, and when one is seen it will include the device without encryption (recommended for the majority of device types for performance reasons)Start Controller Inclusion Mode with Encryption- this will tell the Z-Wave interface to start looking for inclusion requests on the network, and when one is seen it will include the device with encryption (recommended only for the most sensitive device types like locks)Start Controller Exclusion Mode- this will tell the Z-Wave interface to start looking for exclusion requests on the network, and when one is seen it will exclude the device (remove it from the network)Stop Inclusion / Exclusion- this will tell the Z-Wave interface to stop looking for inclusion and exclusion requests on the network
Start Z-Wave Network Optimize
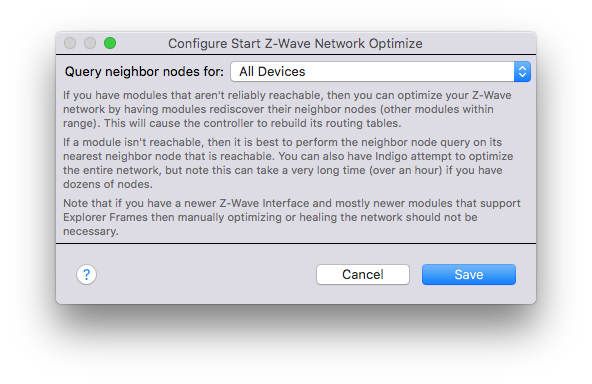
Indigo can optimize your Z-Wave network by having devices rediscover which devices they are close enough to communicate with. This information is then reported back to the Z-Wave Controller so network routing tables can be updated. You can specify All Devices (which will go through all of your devices - this can be quite time consuming so use during low-traffic times) or you can specify a single device.
There is a corresponding Stop Z-Wave Network Optimize action that will stop the optimization process.
Insteon Actions
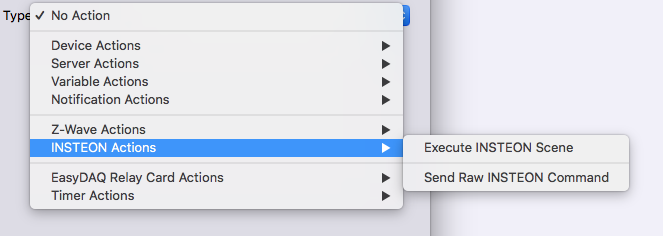
Execute Insteon Scene
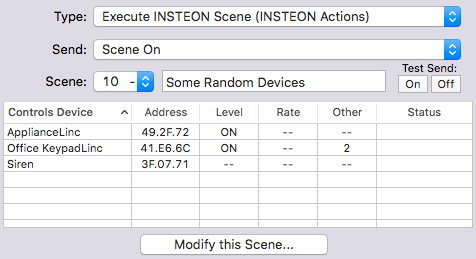
There are nine commands that you can send to an Insteon scene:
Scene On- send the ON command to every device in the group - if the device has an adjustable ramp rate and/or brightness value, those are honoredScene Instant On (to 100%)- send the ON command to every device in the group - but ignore ramp rates and default brightness values (everything comes on full immediately)Scene Off- send the OFF command to every device in the group - if the device has an adjustable ramp rate it will be honoredScene Instant Off- send the OFF command to every device in the group - ignore ramp rates (everything goes off immediately)Scene Increase by 3%- will send a command to the scene to increase all members by 3%Scene Decrease by 3%- will send a command to the scene to decrease all members by 3%Scene Start Increase- will send a command to the scene to begin ramping the devices in the scene up (brighten for lighting loads). The ramping will continue until theScene Stop Increase/Decreasecommand is sent.Scene Start Decrease- will send a command to the scene to begin ramping the devices in the scene down (dim for lighting loads). The ramping will continue until theScene Stop Increase/Decreasecommand is sent.Scene Stop Increase/Decrease- will send a command to the scene to stop any ramping started by the Scene Start commands above.
The Scene: popup represents the Insteon scene number - any name that you've assigned to that scene will also show up in the text field beside it (you can change the name there also if you like). Use the Send On and Send Off buttons to test your scene commands.
The table will show you what devices are in the scene. The columns are pretty self explanatory perhaps with the exception of the Status column. That column shows the status of the device's settings in the scene (edited, added, deleted, etc.) because you can modify scenes without actually performing the link sync. If you have a scene that isn't working correctly the value in that column might help you understand why it isn't working.
Finally, if you need to add, modify, or delete a device from the scene, click on the Modify this Scene... button. See the Indigo and Insteon Link Management page for more details.
Send Raw Insteon Command
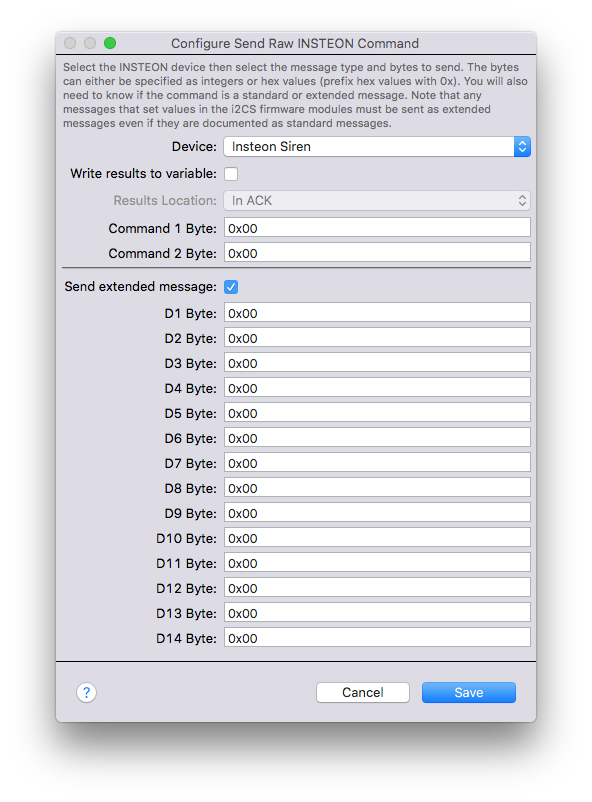
This action will allow you to send a raw Insteon command to any Insteon device. You can send standard messages (2 bytes) or extended messages (16 bytes). You can also have the results of the command inserted into a variable for later processing.
Plugin Actions
Plugins may provide actions that can perform a variety of tasks. See the plugin's documentation for more details. You can check the list of built-in plugins for actions they provide.
Action Options
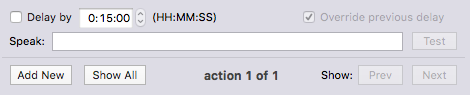
There are three options to each action (and in fact are the only configurable options if you select None as the action Type:):
Delay by hours:minutes:seconds- this will delay the execution of the action by some amount of time (not over 24 hours)Override previous delay- this will automatically delete any previous delays specified for the action aboveSpeak- if you enter text in the text box Indigo will use the voice synthesis to speak the text
Managing Multiple Actions
Use the Add New button below the Speak: text area and the separator if you would like to add an additional action. You can then use the Prev and Next buttons to select which action's settings are being displayed. Press the Show All button to see a list of all the actions:
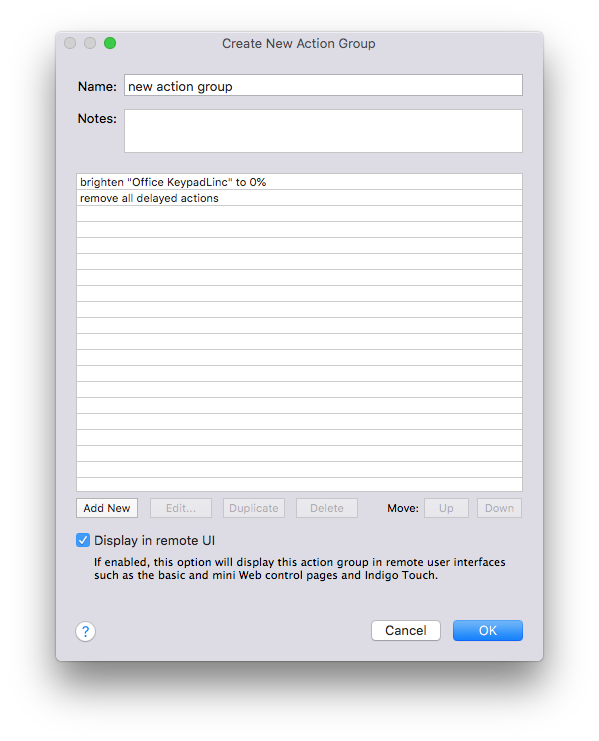
You can then Duplicate or Delete the selected action, or use the Up / Down buttons to reorder the list of actions. To edit a specific action's settings, double-click on the action or press the Edit... button.
*Important!* While you can order the actions in any order you like, Indigo will attempt to execute all actions in parallel. It's not always possible for various reasons, but that's the intent. If you want to order the execution, then you'll need to add delays which will delay the action's execution from the time of the event. So, if you have 3 actions and you want the first to execute immediately, the second to execute a minute after the event, and the third to execute two minutes after the event, then add a one minute delay to the second and a two minute delay after the third.
Action Groups
Action Groups are groups of actions that can be specified separately from Trigger, Schedule, and Control Page elements, so that they can be reused. For instance, if you have a group of lights you turn on at the same time, you can create an action group for those lights and just execute that group as part of the various triggers, schedules and control page elements. If you need to add a light, you only need to add it to the group rather than edit each individual trigger, schedule, etc. that needs to control that group. Action groups are also optionally shown in remote clients so it's an easy way to control some collection of devices from those clients without having to adjust each one manually.
It is important to note that individual actions are run independently. If you need your actions to be executed in a specific order, you can use "Delay by" (see image). Very often, even short delays will be enough).
To create a new action group:
- Select
Action Group Listfrom theViewmenu. - Press the
New...button at the top of the main window. Namethe group, for example "going to bed."- Optionally give the group some
Notes. - Select the action
Type:and select the various options. (See the actions section above for details on all of the action's settings, and information on managing multiple actions to the Action Group)
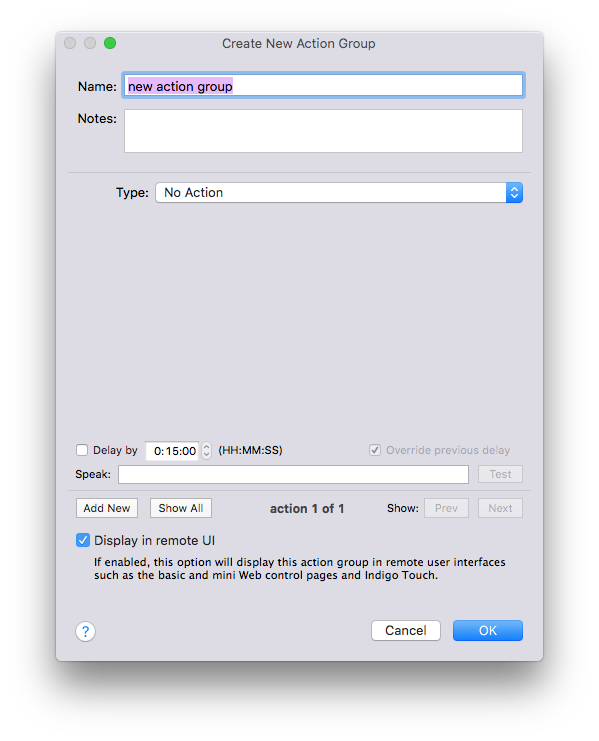
Indigo includes a built-in Web server that allows remote execution of your Action Groups from Indigo Touch or any modern Web browser (Safari, Firefox, Opera). Follow the instructions in the Starting Indigo Server section of the Getting Started guide to make sure that the following options are enabled: Start and connect to Indigo Server on this computer, Allow remote access, and Enable iPhone, iPod touch, and remote Web browser access.
The Display in remote UI option at the bottom of the dialog will make this action group show up in remote clients like Indigo Touch or the web pages. When you see them in those UIs you can tap/click the action group and it will be executed so it's an easy way to control scenes from those clients.
TIP
if the Action Group is in a folder, that folder must also be marked for Remote Display.